Getting started for firm owners
The first hour as a firm owner, in order, with screenshots: branding, your team, your book, the rules your clients and advisors work under.
You own the firm's WealthY. In the first hour you give it your look, bring in your people and your book, and set the rules everyone else works under. Everything below is in the sidebar; nothing needs a call to support.
Before you start
- Sign up at wealthy.to/signup. Seven screens, one button each: your firm, your plan, your data, your mailbox, your team, a call with us, done. The first screen creates the firm and emails you a link: one click confirms the address is yours, signs you in and carries on at screen 2. Nothing goes out under the firm until then. After that you can leave and come back to any screen. If WealthY set the firm up for you instead, you receive an invitation email: open it, choose a password, and sign in at wealthy.to/login.
- The first screen asks who your dealer or custodian is. One marked forms ready has its account forms mapped already, and your requests use them from the first one. That means its forms are mapped in WealthY, not that we partner with it. Not listed? Type the name: we work on adding its forms, and Operations > Request settings is where you upload your own PDFs.
- Have your logo (PNG or SVG), your brand colours, and your list of advisors with their email addresses.
- If you are leaving another CRM, have its export or your Wealthbox API token ready. See Switching to WealthY.
Everything the signup screens do can be redone later from the app, in the sections below.
1. Your Home
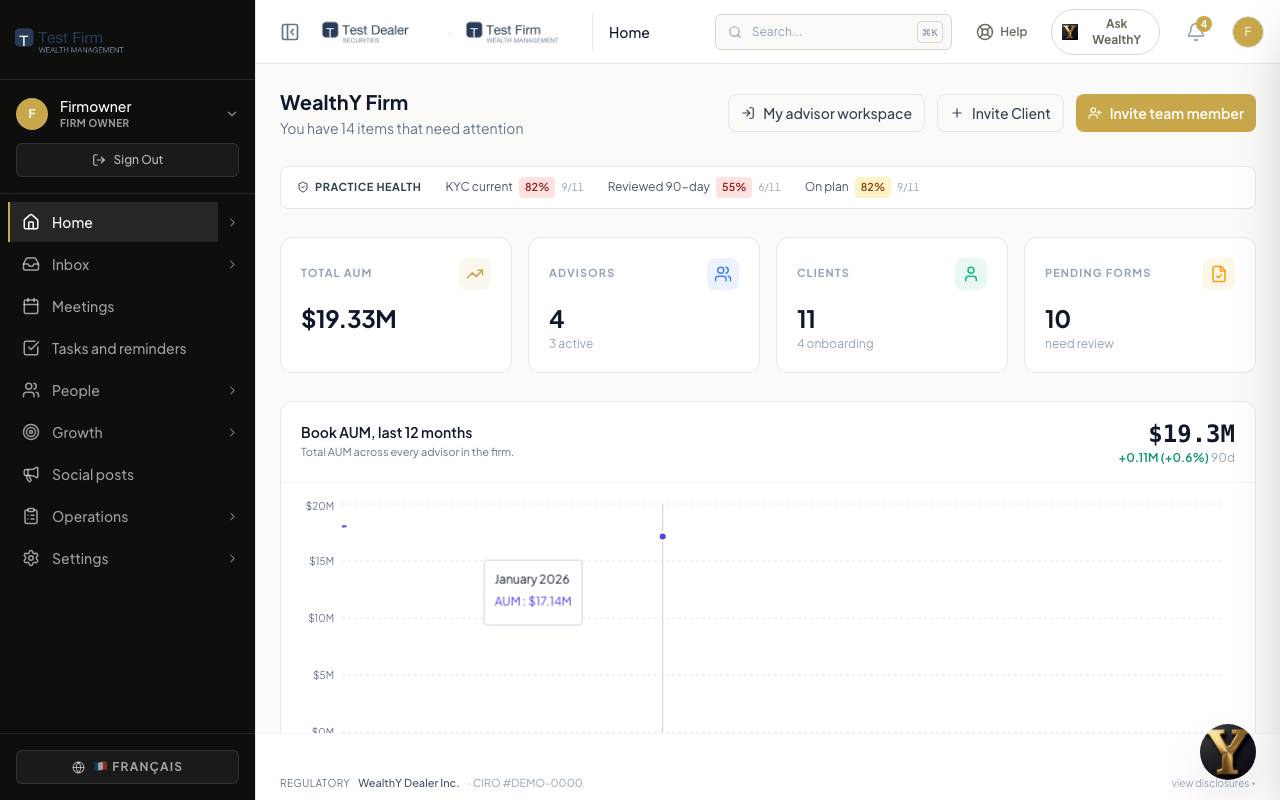
Home shows assets, advisors and clients at the firm, and a list of what needs attention: unsigned requests, KYC reviews due, invitations not yet accepted. Each line opens the thing it names.
The sidebar: Home, Inbox, Meetings, Tasks and reminders, People, Growth, Social posts, Operations, Settings. Items with a small arrow open a menu of sub-pages when you hover.
2. Branding
Settings > Branding.
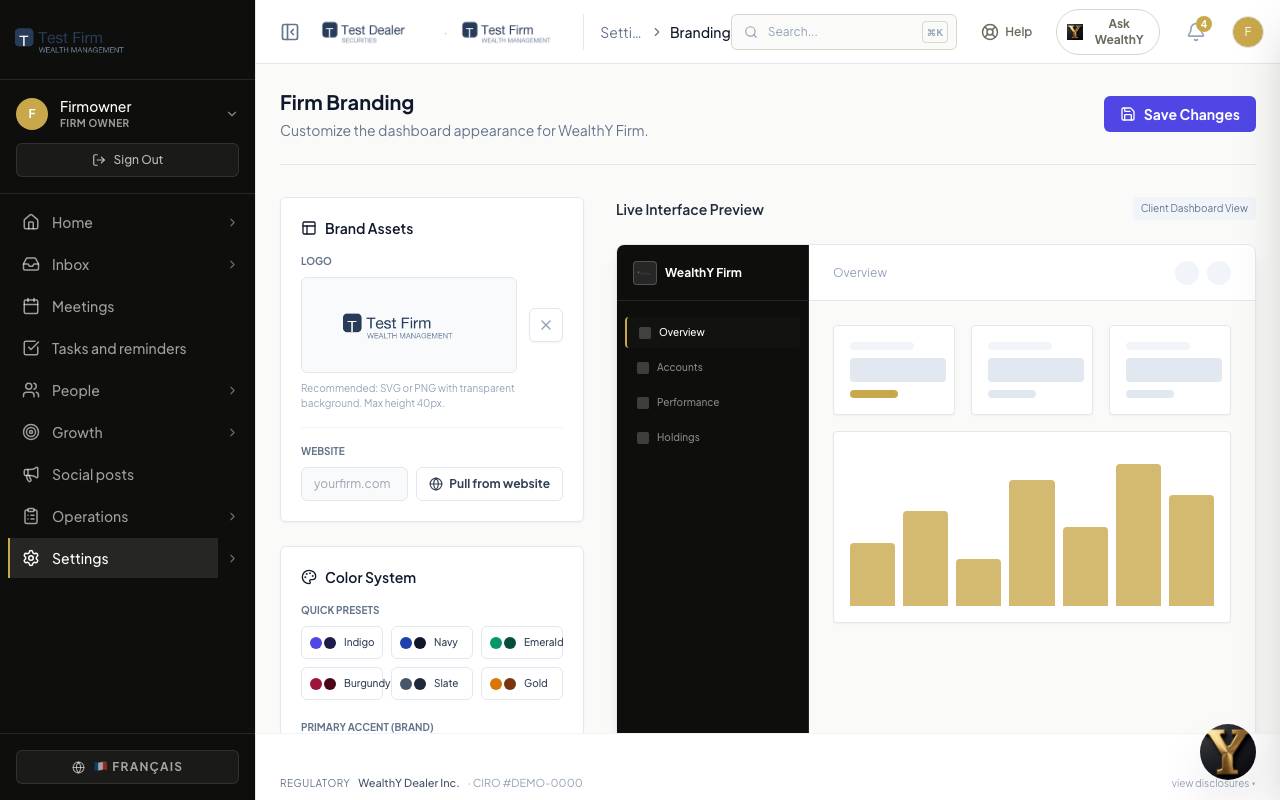
- Upload logo. It appears in the sidebar, on the client portal, on every PDF and in every email the firm sends.
- Pick a primary colour and a secondary colour, or start from a preset. The live preview on the right shows the advisor view and the client view as you go.
- Save. Every seat at the firm sees the change on their next load.
3. Your team
People > Advisors > Invite team member, or Add your team from a file.
- One person: enter an email, pick the role: advisor, sales, or admin support. Admin support seats help advisors and can be given access to an advisor's workspace.
- The whole team at once: a CSV or Excel file with name, email, role, rep code and supports (the advisors an admin support person works with). Download the sample, check the preview, then one press. Nobody already on the team is invited twice. The same file works on signup screen 5.
- The invitation goes out from your firm's address. Team invites shows who is ready, for example "4 of 6 ready": invited, signed in, mailbox, calendar, and for advisors their rep code and booking link.
- Billing is per advisor seat. There is no seat cap; an added advisor simply bills.
4. Your book
Operations > Data.
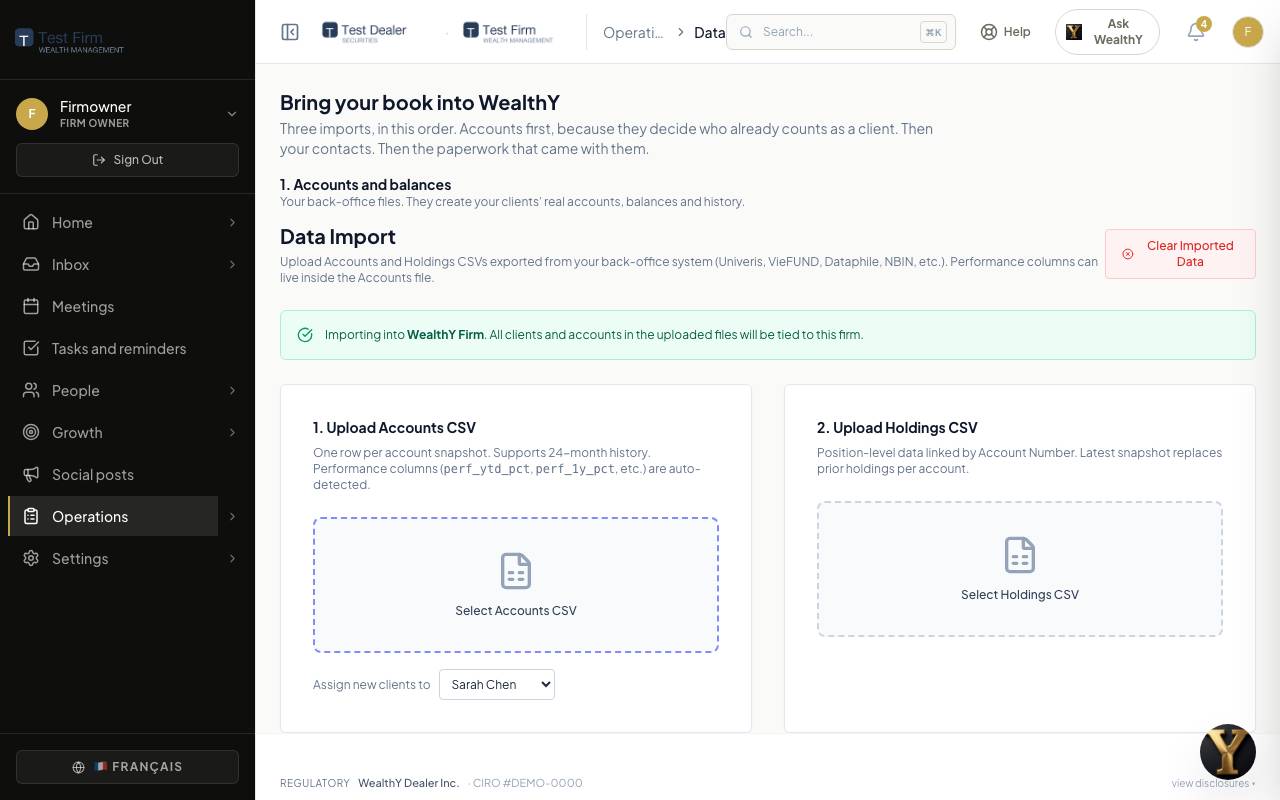
- Accounts, if your custodian or back office gives you a daily file. Set up the feed here or import the accounts CSV. Contacts whose email matches arrive tagged as current clients.
- Contacts: drop your export. Every column is shown with where it lands before anything is written. Then triage: tick who is a client, create their onboarding packages, send the rest to the pipeline. Step-by-step on the Wealthbox, Redtail and spreadsheet pages.
- Documents: drop a folder of statements, IDs and void cheques. Each one is matched to a client for you to confirm, and prefills their paperwork.
Make sure every client has an advisor before any invitation goes out.
5. What clients may ask for
Operations > Request settings.
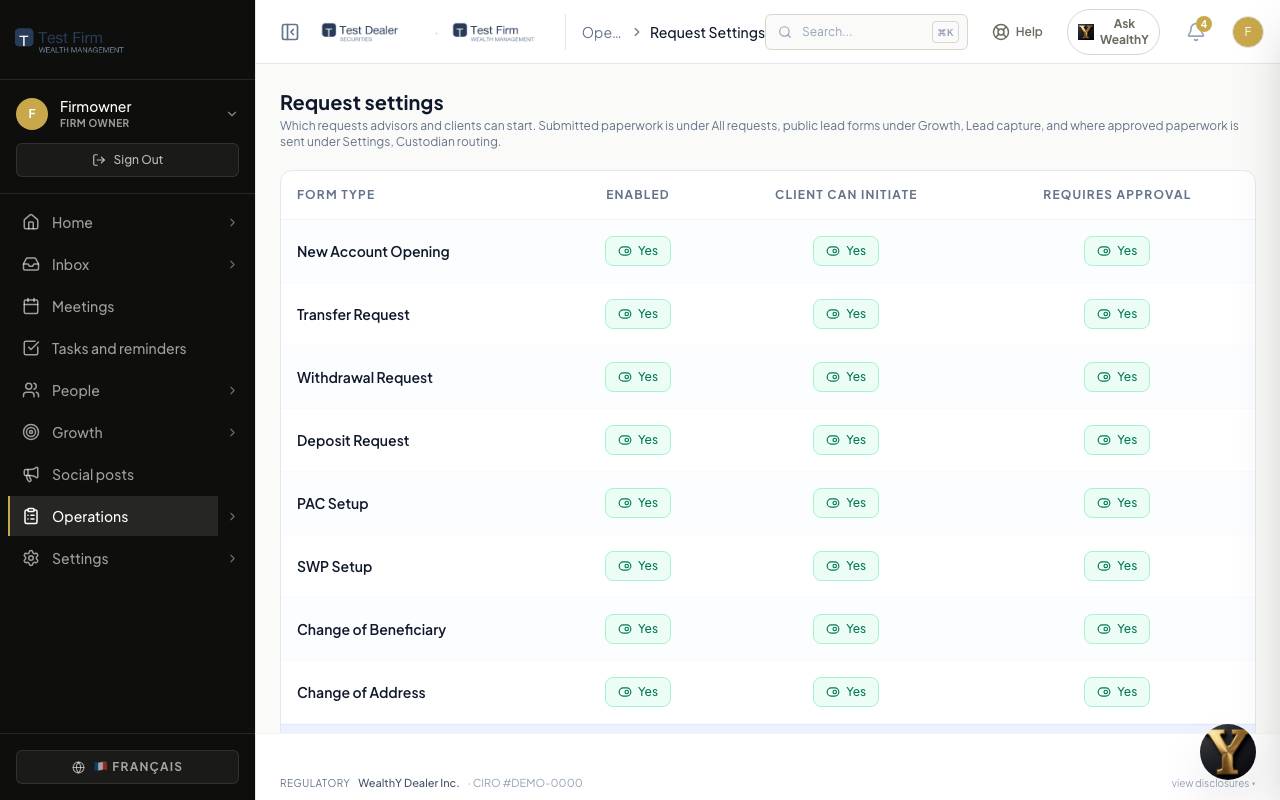
Turn on the request types your clients may start from the portal: account opening, transfer, deposit, withdrawal, regular contributions, regular withdrawals, change of address, change of beneficiary. Advisors can always start any type. Then Settings > Custodian routing to say where signed paperwork goes for each type.
6. Your KYC questions
Operations > KYC questions.
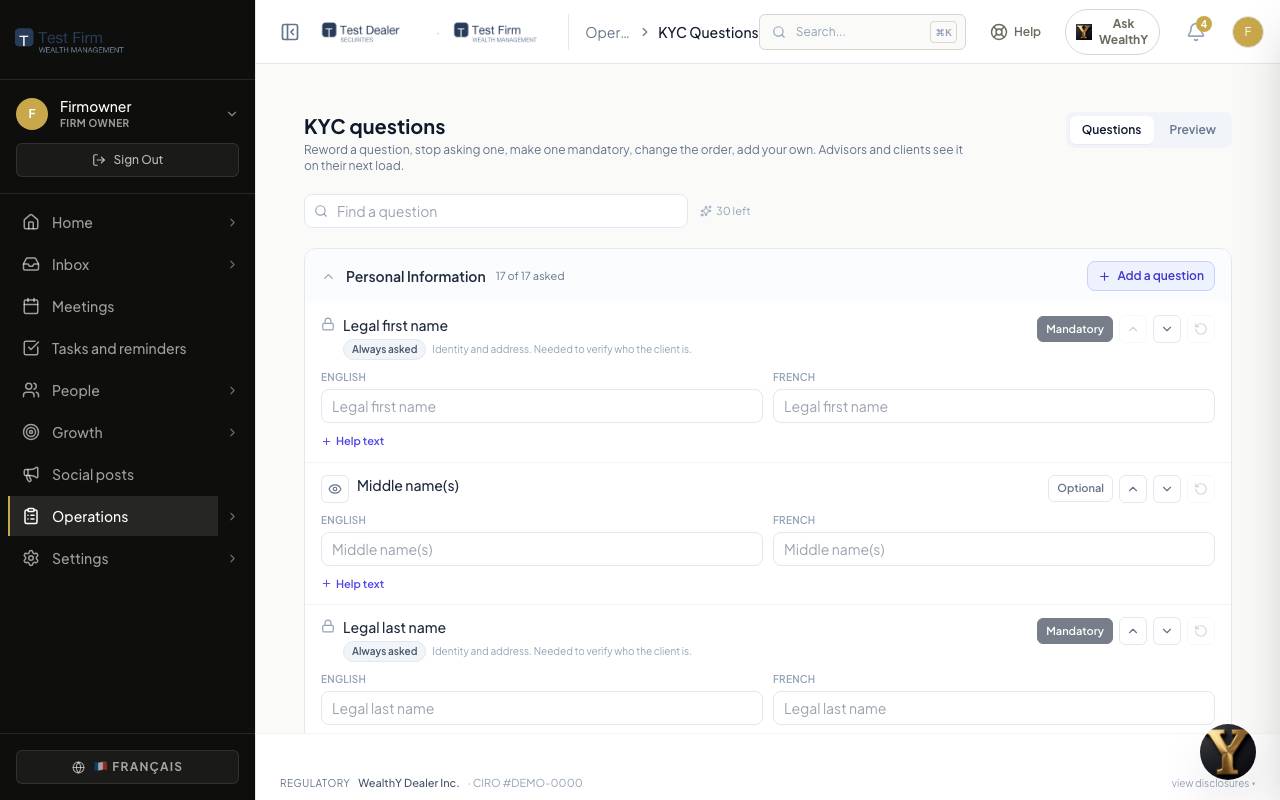
Read the questions as your clients will. Reword any of them in English and French, stop asking the ones you do not need, add the ones you do. Questions a regulator needs on file show a lock and the reason. Every change saves on its own. Details on the KYC page.
7. Integrations
Settings > Integrations.
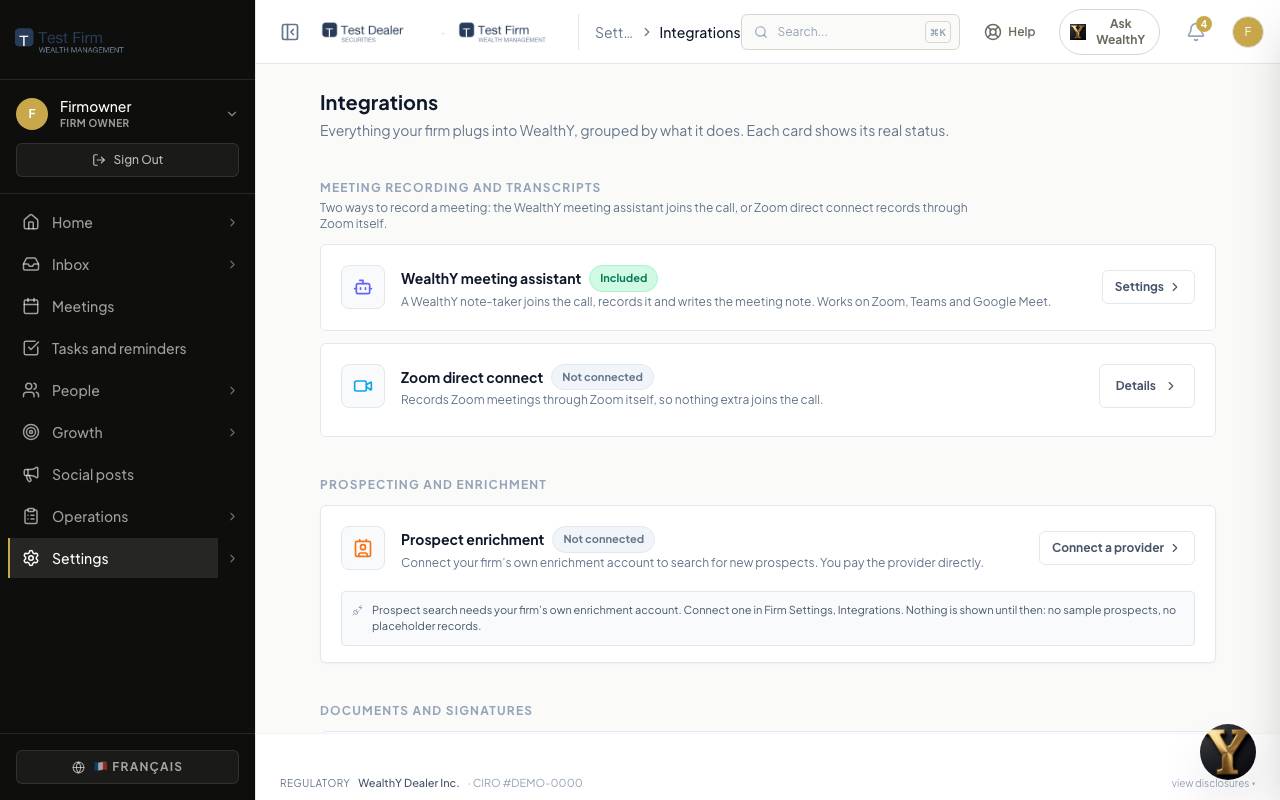
- E-signature (Documenso): clients sign paperwork from the portal.
- Meeting recorder: the WealthY assistant joins advisors' calls and writes the follow-up (Pro and up).
- Custodian feed, Broadridge, Addepar: portfolio data.
- Compliance archive: copies of outbound email to your archive.
Advisors connect their own mailbox, calendar and LinkedIn from their own Settings; you do not do that for them.
8. Settings worth a look
- Team policies: two-step sign-in, supervisory inbox access, who may create API keys.
- Client page: rename or hide portal tabs, lay out the client Home.
- Email deliverability: the checks for your sending domain.
- Phone: the dialer and your local numbers (Pro and up).
After the first hour
- Sign in as yourself and ask Ask WealthY: "Which advisors have clients with no KYC on file?"
- Watch Operations > All requests and Audit log for the first week.
- When a client asks a question nobody expected, the Help button files it straight to WealthY.